Unlike Android, transferring content between an iPhone or an iPad to a laptop can be a headache. A task like this will only take you around 1-4 minutes on an Android device, but on an iPhone, you will have to find the most suitable method as it’s more complicated. I will go over three different ways you can use to download photos from an iPhone to a laptop. These ways include Windows File Explorer, iCloud, and Google Photos.
Change iPhone default from HEIC to JPG

First, if you’re a picture person and own an iPhone an important thing that you must know is that the default picture format for iPhone and iPad cameras is HEIC. While you should not have any problems if you rarely export pictures out of your iOS device, HEIC pictures are not good for sharing. This picture format is usually incompatible with many other devices or platforms.
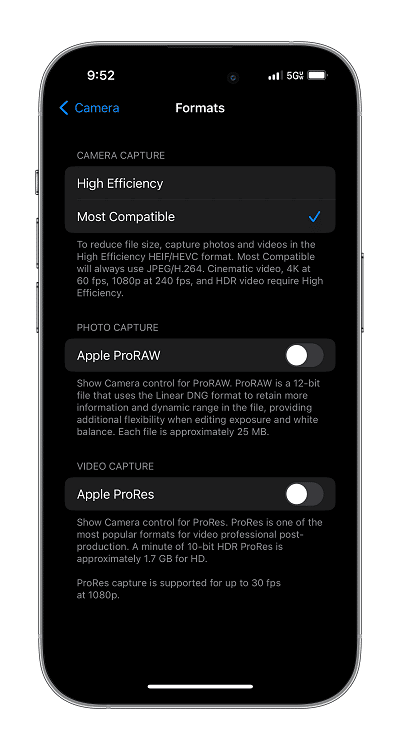
That’s why it is recommended to change your iPhone/iPad default picture format to JPG/JPEG. To change your iPhone default from HEIC to JPG, tap Settings> Camera> Formats> Most Compatible.
Transfer photos from iPhone to PC using File Explorer
The easiest way of getting your iPhone photos to your laptop or PC is by using the native Windows File Explorer. Since this is part of Windows you do not need to download any additional software. To do this:
- Make sure to have iTunes downloaded.
- Plug your iPhone or iPad into your PC and unlock your device.
- Click on your Windows search bar and type File Explorer and open this program up.
- On the File Explorer, click “This PC” on the left sidebar.
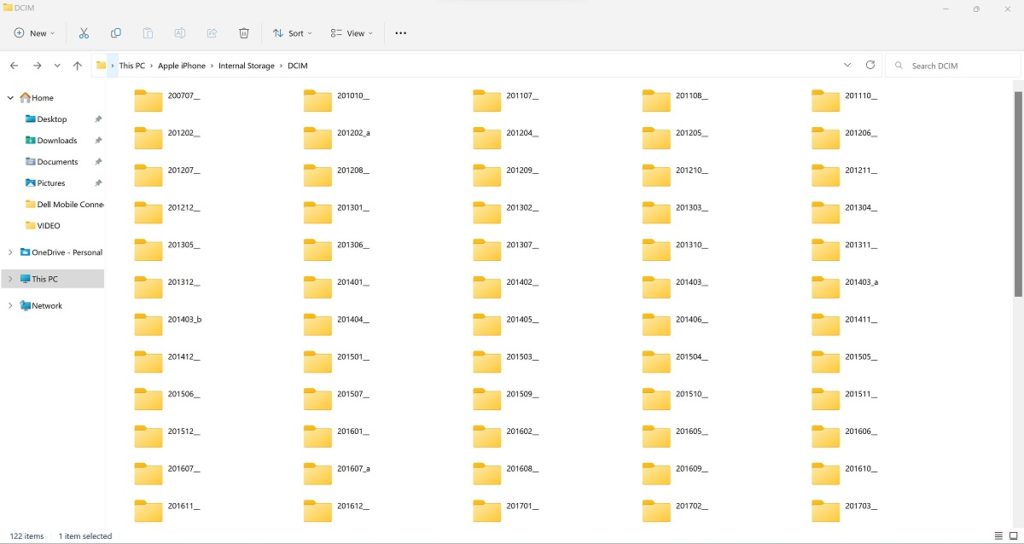
- From there, you should see your iPhone. Click Apple iPhone> Internal Storage> DCIM.
- In the DCIM folder, you will have a structure of folders sorted by year_month of when the pictures or videos were taken.

Each of those folders will contain pictures and videos taken within that year and month. From there, all you’ll need to do is drag out the content you would like to save on your PC.
If saving all of the pictures with the year_month folders annoys you, you can transfer all of the pictures by typing “.JPG” on the search bar that says “Search DCIM.” This will search for all photos in “.JPG” format on the iPhone. For videos, just type in “.MOV” to get a list of all videos on your iPhone without displaying the folder that it’s in.
Download photos from iPhone to laptop using iCloud
The second easiest way of downloading photos from your iPhone to a laptop is by using iCloud. To do this, we first must enable iCloud photos syncing by going to Settings> [Your Name]> iCloud> Photos> Sync this iPhone (On). Now all you have to do is login into your iCloud account at icloud.com/photos.
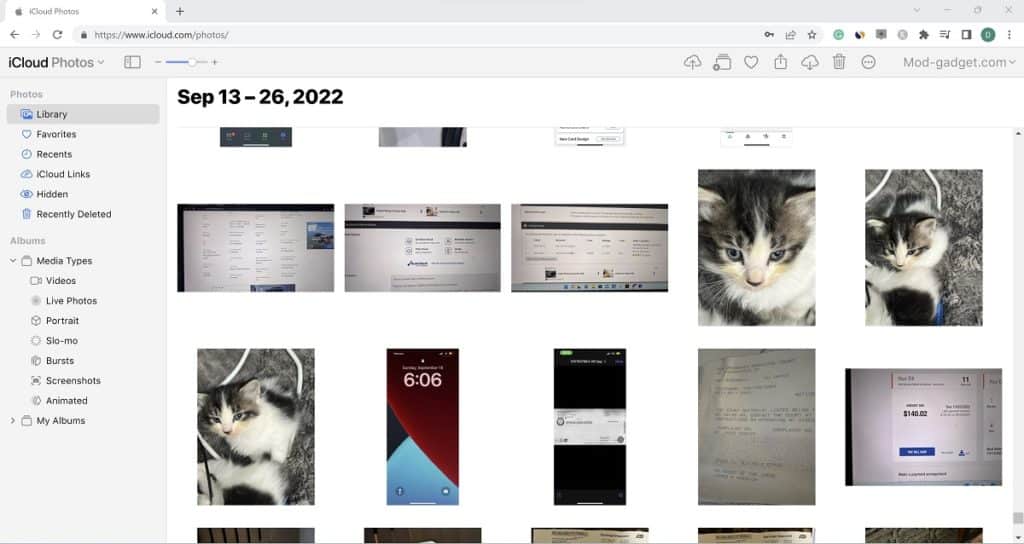
The iCloud Photos portal will show all of your iPhone photos and videos as long as they have been backed up into your iCloud account. The iCloud Photo portal is also more organized and cleaner than the Windows Explorer method shown above.
Within the portal, you can delete, share, or download any of the images/videos found on your iOS device. You will also be able to upload images to your iCloud Photo from your PC/laptop and they will be downloaded to your iOS device.

iCloud Photos vs File Explorer
Although downloading photos from an iPhone to a laptop is less complicated using iCloud Photos, it will NOT be the preferred method for many people. If you have thousands of photos, then the File Explorer method is the one you’ll need to use unless you want to pay for more iCloud storage. iCloud only offers 5GB of free storage, so if you have thousands of photos and videos, you’ll need to buy more iCloud storage. Also, remember that photos in the “Recently Deleted” folder count toward your iCloud storage, so make sure you delete those pictures.
Can you download Google Photos on iPhone?
If you prefer the iCloud method over the Windows Explorer method, then another similar service you should definitely try is Google Photos. Although Google Photos is made by Google, Apple’s main competitor, you can download Google Photos on the iPhone with no problem. The Google Photos app/service even works better on iPhones than on most Android devices.
Unlike iCloud Photos which only gives 5GB of free storage, Google Photos gives 15GB of free storage. To get the advantage of this, all you have to do is download the Google Photos iOS app and log in using a Google account.
After you grant permission for the app to upload all of your photos/videos on Google’s servers, you can access them and download them on any device by login into your Google Photos portal at google.com/photos.
